Chapter 4.2 : MPEG ENCODER
Converting AVI files
Ok, you
have already been briefed on how this process is done using MPG files. This process is pretty much the
same as what you read in Chapter 4.1 with MPG files. The difference is that there is a good chance that the
video and/or audio files will not be able to be decoded by MPEG Encoder and
thus some other program will be needed to help it out.
I will give
you a brief overview of the steps needed for basic AVI files in this Chapter and point out where extra steps
may be needed for more complex files.
Start up
the program and you will get this opening
screen.
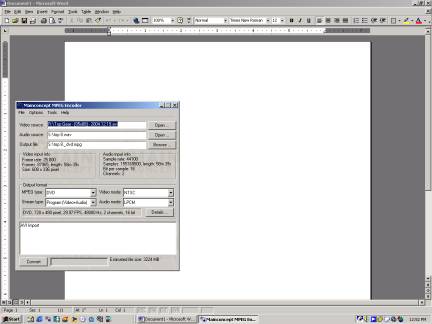
Again, just
like in Chapter 4.1, you will need to specify the locations of the video and
audio portions of the movie are on the hard drive.

You will
now click on OPEN on the top
right. Then a menu appears
with browser to find your files.
Now just
like the MPG example, MOST of the time, it should come up with the video and
audio. If that happens, you are
good to go.
But you
will find that this is so only about 60% or 70% of the time. You will often get those stupid
idiots out there getting too fancy and encoding their videos in the strangest
and weirdest formats. So lets look
into what happens if that happens.
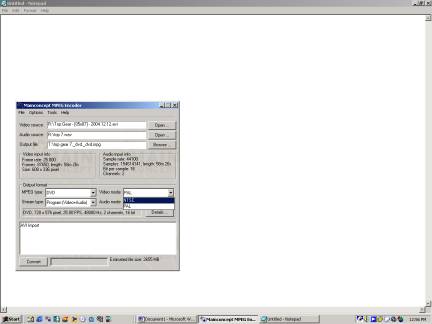
Now as you
see in this example of the Top
Gear, the audio didn’t show up.
This means that MPEG Encoder can’t figure out how to play back the
audio. It basically means
that you need another program to extract out the audio from the AVI. One of the easiest programs for
this is Virtualdub. I won’t
show you in this file how to do that, please refer to the other chapter to see
how that is exactly done.
Ok, I will assume that you will do
that, and return to this point with a working *.WAV
file. By the way, the
WAV files that this program takes are the same that standard Windows takes, ie. 44.1Khz, 16 bit, stereo, in Windows PCM format.
I will also
add that if the program doesn’t know how to decode the video, then you will
have to do a similar thing. You
will have to find another program or codec to decode the video to something
more normal. Then try it
again.
So, we will
hit the second OPEN button which is the one for audio. Again, another window opens up and
allows you to browse to where you have the *.WAV file. Select the WAV that you just made
from VirtualDub or WinAmp or even CoolEdit.
Ok, last
step, specify where you want to save the file, by clicking browse. The default is in the same
directory as your source video file.
Don’t forget
to check that you are recording the right kinds of file, in this case it will
be a VCD. You also want to
check that NTSC is also checked off because you don’t want it in the wrong play
back format.
If you are burning VCD or SVCD,
like this the example, I will just show you how to drag and
drop in Nero to make the VCD or SVCD. If you made a DVD MPEG then you will have to
read a bit about how to use the DVD authoring programs to break the MPG file
into VOB, IFO, BUP files, which I have later in this
tutorial.