Chapter
6 : Virtual Dub
Part 1 :
Extracting The Audio Out Of An AVI
When video files start becoming a little NON-compliant, then we have to start pulling out the tools. This of course is the WORSE part about video downloads and playing back miscellaneous video files. I am sure you came across the time you wanted to watch or play back a video and it comes out all screwed up and you spend probably more time than the length of the video to FIX the problem. Of course, you end up reinstalling Windows and you forget to reinstall the codec and you have the problem again. So here, in this tutorial, is my inspiration of how to standardize your videos in your collection so you will never have to worry about them ever again once they are clean and working.
Ok, this
tool is the very powerful Virtual Dub. I will be covering many things you can do with this
program. In this chapter, I
will cover how to do something simple like stripping the audio track out of a
movie file.
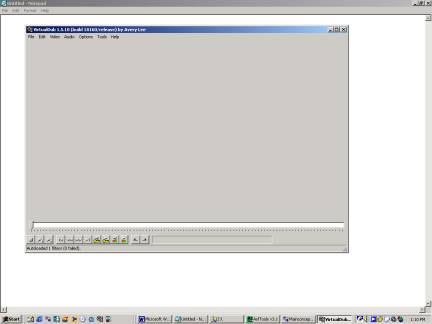
You start
it up and you get a screen as follows:
We will
now, need to specify where our AVI
movie file is. Click the
FILE word at the top left on the
command bar. It will open a
browser window as follows:
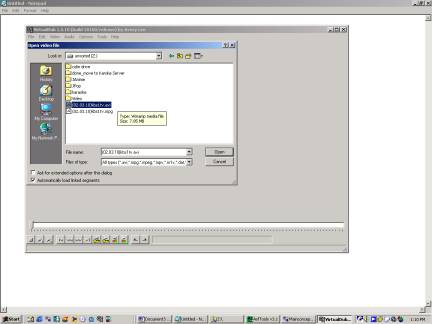
Select your
movie file you want to get the audio out of.
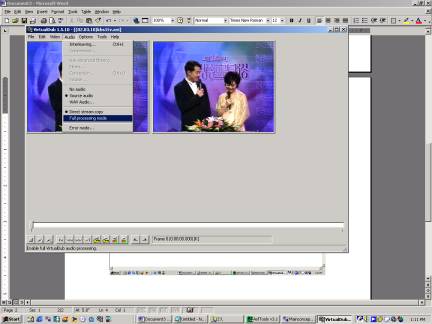
Ok, it will
return to the main menu again.
It will look a little different. You will see 2 frames now with the first frame of your
movie file in it as shown in the picture above. The one on the left is the original input video file. The one on the right is the
altered one with all the filters applied to it. I won’t explain that part right now, I will save that
for later chapters.
Now, select
AUDIO from the top bar like shown in the picture. You need to make sure that FULL PROCESSING MODE is
checked.
Once you do
that, you will select AUDIO again, and this time you will notice that the
option CONVERSION is now available
(the picture above shows it greyed out).
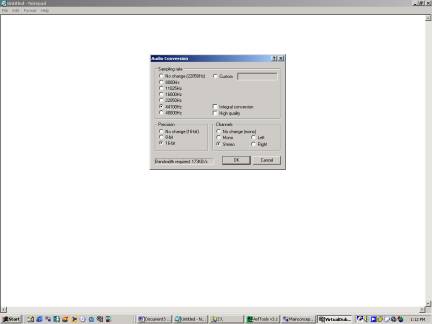
Ok, this
sub-menu comes up. You want
to make the audio Windows PCM compliant, which is 44.1Khz, 16 bits, and
stereo,.
So check
those radio buttons for those options and click OK.
We go back
to the main menu again.
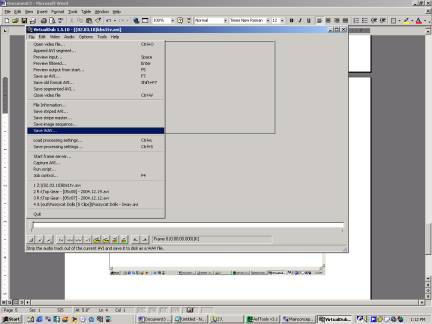
Now we go
to save it. Select FILE,
then scroll down to the option SAVE WAV.

Ok, just
type in the name you want to save the audio file and press SAVE.
That’s
it. Let it do it’s job and
then you will have a cleaned audio file.