Chapter 3 : How To Use DVD
Shrink
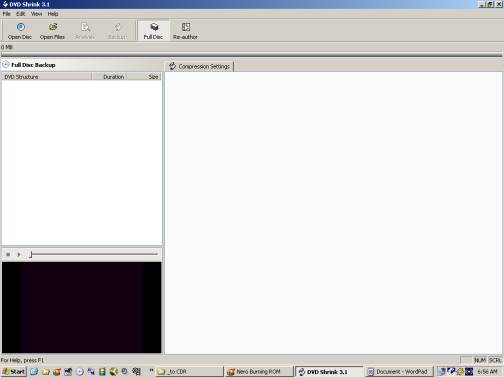
When you start it up it will look like
this.
Click on the icon on the top bar
labeled OPEN FILES. A browser window
opens. Find where your
folder of the files that DVD decryptor made, and click OK.
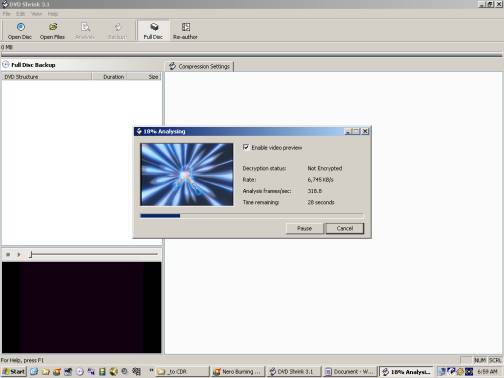
It will do a quick little run through of
the DVD files.
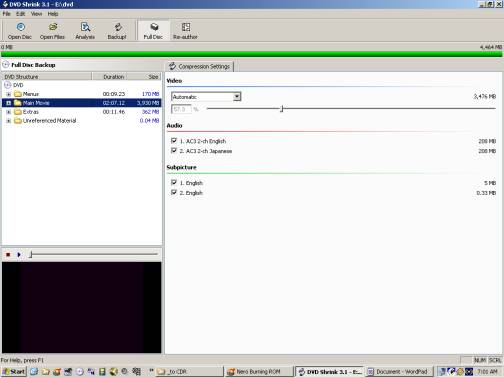
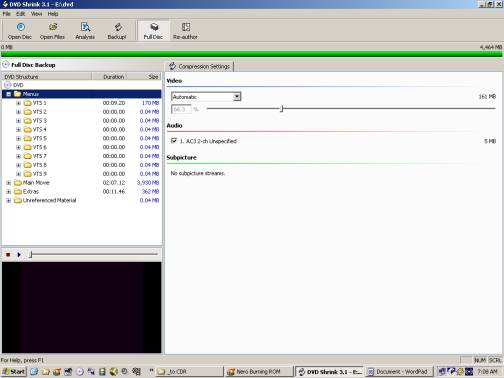
Then it will come up to a menu like this.
Now what this example is showing is, that
in order to fit everything on the single sided 4.464G DVD-R,
it will need to compress the video/audio
down to 57.3% (a loss of 42.7% quality). Ok, some
people don't care, some do. So now the fun part of personal
preference begins.
Here we get to alter how the copy of our
DVD will look like. Now, I
am going to assume that you are
not such a quality freak or else you would have already taken Nero and burned
these files on to 2 DVD-Rs or that
you have money to burn (literally)
and have used a dual sided media to burn this movie.
Our goal (my goal) then would be get back
as much quality as possible without losing any of the important features.
First thing can be done is reduce the size
of the opening menus.
Click on the Menus folder on the top left
window.
You can see here, the contents of the main
menu. Of the 170MB or so,
almost all of it wasted on the folder labeled VTS 1. So lets
click on that folder since fixing the others won't rescue much space back.
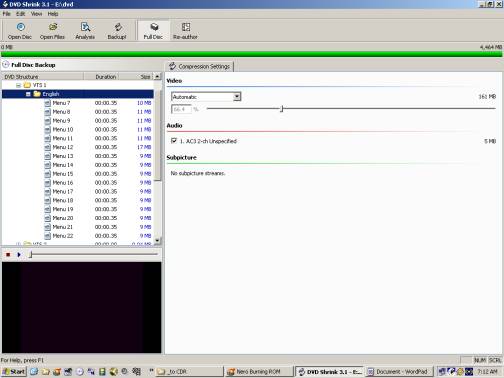
Now we see that an English folder contains
menu items 7 to 22 consuming various MBs and in Automatic mode is only costing
us 66.4% for that 170MB.
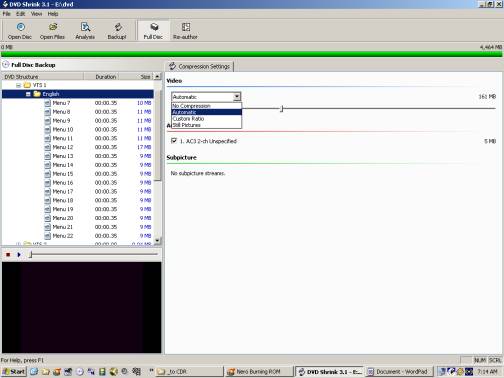
So, if you want to keep the menus nicely animated and smooth
flowing, then you can click on that word Automatic and select Custom
Ratio. Now drag that marker
on the linear bar all the way to the left. You will notice that percentage go up and down as you
slide the compression ratio left or right. All the way left, is as low as you can go, which in
this case is 55% which eats up 133 MB of the DVD. So in conclusion, it means we only saved 36 MB of DVD
to in order to keep the motion in the menus intact. You will also notice that the Main Movie size was
3,930 MB is now 3,956 MB so the quality of the movie went up a little bit.
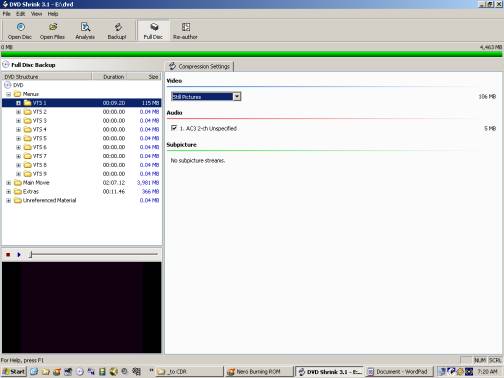
Now if you are like me. I usually don't give a shit about
the menu. It can be jerky,
it can have no audio, it really doesn't matter. It is the main movie that matters. So, I will conserve
space by selecting Still Pictures in the right hand window. Now the space drops to 106
MB. So, a savings of
64 MB, in this case double.
Alright, where else can we chop in order to
gain some more space back?
Well, as you can see on the right, there is
366 MB used up by the Extras menu.
My opinion is some the extras are important
to keep in motion but a lot of times it can be trashed because the extras are
nothing but stupid trailers for other movies.
So just like for the Menus, click on Extras
and see what we can save.
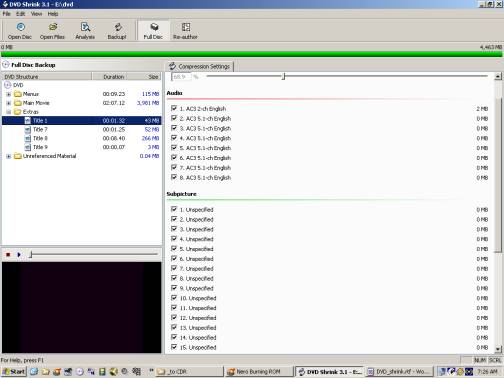
Now, we have a Title 1 which is consuming
43 MB. What is it? Well, there is video
preview window on the bottom left
which you can have a look at what it
is. There is a Stop, Play
and slider so you can preview your clip.
In this case (and it usually is) the FBI copyright warning. If you find this annoying, and
many do, you can change it.
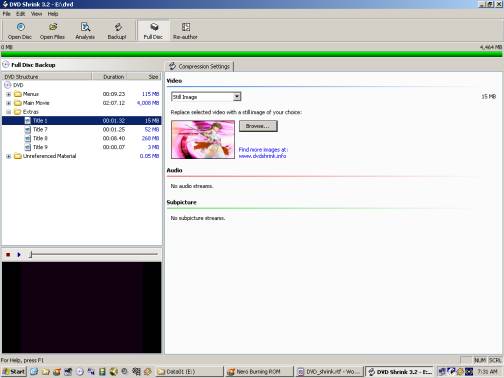
On the right window, you can click on the
Automatic button and select Still Picture.
You can now, browse your hard drive for
any *.jpg picture you want. Notice that 43 MB now
dropped to 15 MB. Good
savings!
OK NEXT.
Title 7 on the left menu is a credit less
OP and ED. I like to keep
them intact but I don't care about quality.
Much can also be said with interviews. I mean, the quality can suck on those
but it is important not to have
them jerky or still framed. For this, I will pick custom ratio.

I will also uncheck the ENGLISH language
box. I know in this case I am only
saving 2 MB, but sometimes
when the audio is AC3 or DTS that can eat
up a lot of disk space.
Ok, NEXT.
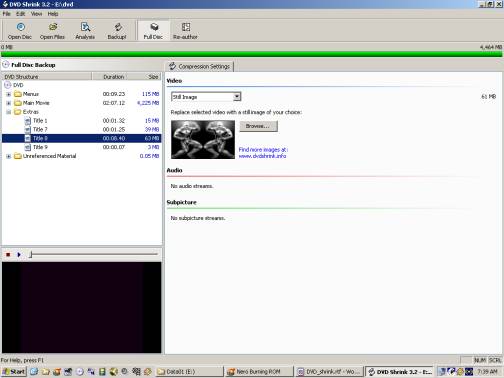
Title 8 is previews of other movies.
I really don't care, so I am going to
replace it with a Still Image of the Cho Aniki Brothers! 268MB down to 63 MB.
Ok, so back to the Main Movie again because
that is about all we can do without touching the core of the DVD.
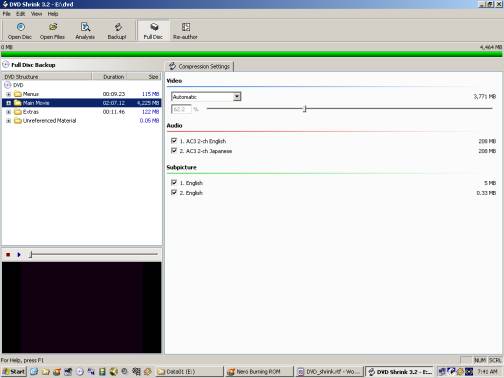
Ok, so we are at 4,225 MB and 62.2%. We are a long way from 100%.
However, there is 208 MB used for English
Audio and 208 MB used for Japanese Audio.
If you don't care for one of those, you can
uncheck the box on the right to gain that back.
But for me I like to keep the IMPORTANT
languages. What you deem
important is probably
different from me, so this is up to you.
Anyway, so lets say we are ready to compress (or in this case
SHRINK).
Click the icon on the top that says BACKUP!

OK, a quick confirmation page.
It is tellling you that it will compress
all the files to your hard drive
in (this example) E:\dvd2. You can click that browse button to
change it to where ever you like.
Make sure you have about 4.5+ Gigs free. The new versions of Shrink has a kinda burner in it
however it doesn't always work so I usually use Nero instead, but try it. You still have the files on E:\dvd2 to
go back to.